将个人博客部署到个人服务器
服务器安装git和nginx
- 安装git
yum update
yum install git nginx -y
- 建立文件路径:
mkdir /var/repo/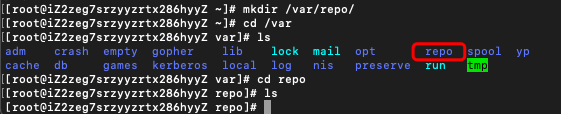
- 修改权限:
chown -R $USER:$USER /var/repo/
chmod -R 755 /var/repo/
- 创建远程git仓库:
cd /var/repo
git init --bare {自定义仓库名name}.git
配置nginx托管文件目录
- 创建目录,并修改目录所有权和权限:
mkdir -p /var/www/hexo

chown -R $USER:$USER /var/www/hexo
chmod -R 755 /var/www/hexo- 修改nginx的default文件使得root指向刚刚创建的/var/www/hexo目录
vim /etc/nginx/nginx.conf
- 重启nginx服务
service nginx restart- 访问chenluo77,com或者公网IP
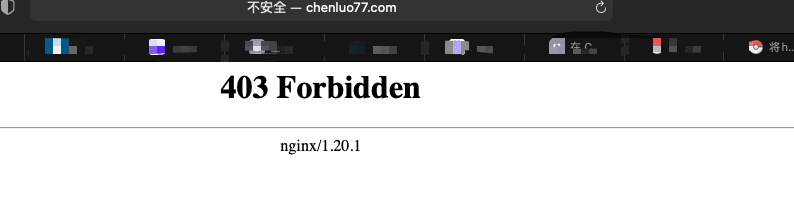
如果没有成功会出现404
- 检验是否成功
- 创建index.html
cd /var/www/hexo

vim index.html
输入以下代码:
<html>

<body>
<p>This is my Blog.</p>
</body>

</html>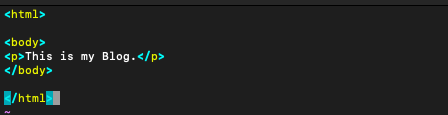
- 再次访问
chenluo77.com

Git钩子(hook)
- 执行下面命令,将自动生成的echo.hit/hooks目录下创建一个新的钩子文件
vim /var/repo/ganahBlog.git/hooks/post-receive- 打开文件后,写入以下代码
#!/bin/bash

git --work-tree=/var/www/hexo --git-dir=/var/repo/echo.git checkout -f
注意文件内容
- 赋予该文件可执行权限
chmod +x /var/repo/ganahBlog.git/hooks/post-receive
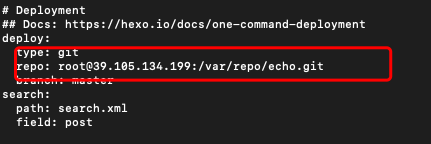
- 编辑站点配置文件
_config.yml, 将 url 改成https://{云服务器IP}/

将 deploy 目标改为 {服务器用户名}@{服务IP}:/var/repo/ganahBlog.git:
执行命令部署:
hexo clean && hexo g -d